I have had the best time the last couple of weeks getting ready for a scrapbook class, because it made me get one of my own put together so that we could have a sample for each layout. Getting prepared was unique to me because each person could pick which Simply Scrappin' Kit they wanted, and we just tweaked each one to match the layout's "Scrap Map" (which I will be providing to each attendee, by the way -- I've got them drawn out, but need to make them bigger, I've been told :) Most were making baby albums, using "Love Sparkles" for the baby girl albums, and "Happy B'day" for the baby boy albums. I will post pictures of their albums at a later date, but two of my ladies are using a retired kit, "Toy Box", and I am making one as well, so will be posting those pictures as I get them done.
I labeled each layout by the pages, so I am putting them on in order. I will make a complete list of what I used at the end, but if something is unique to a certain layout, I will make a note. Sorry that I didn't crop the pictures to get rid of most of the wall, but I'm getting ready to go to my nephew's graduation, but wanted these posted first! Here we go:
Oh, I found out that if you click to make the pictures big, and then click on it again once it is big, you can get an even closer picture. So click twice on each to get the "big picture" -- get it??? :)
Pages 1 & 2:

When you click on these so that you can see them bigger, you will see that we used the Perfect Polka Dots embossing folder in the Big Shot on the widest Kraft CS. We rolled it from each end of the piece, and covered the part that wasn't embossed with stickers from the Simply Scrappin' Kit. This kit is a retired one, by the way, from last year's catalog called "Tie the Knot".
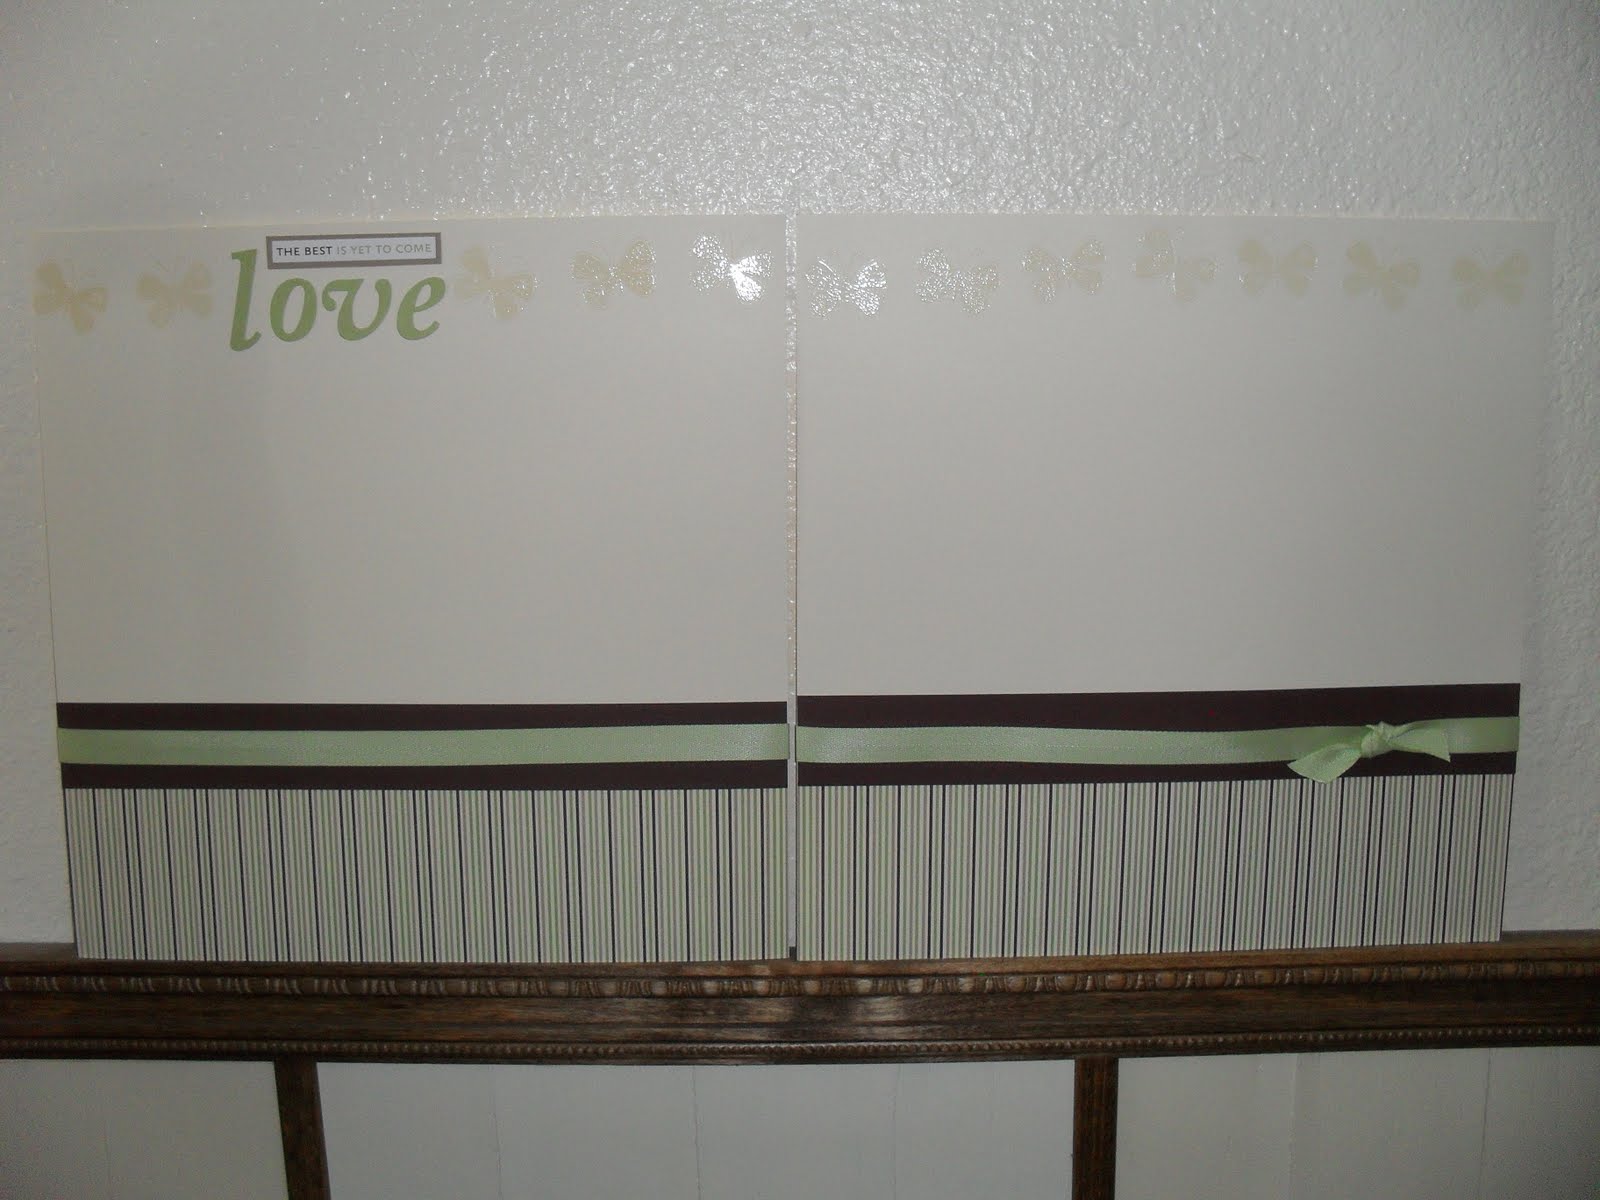
Pages 3 & 4:

Pages 5 & 6:

These pages were stamped with the Priceless set in Versamark, and embossed with clear emboss powder. Easy, breezy and so pretty!
Pages 7 & 8:

The hearts are stamped on Whisper White, and covered with vellum paper so that it makes a journaling block. We adhered the vellum with brads.
Pages 9 & 10:

We created our own patterned paper using the Priceless set and Pretty in Pink Craft ink. The lighter pink is the craft ink without embossing powder, just heat set. The darker pink is from using craft ink with clear embossing powder. Don't know if you can tell from the picture, but it is so pretty in real life because we used textured cardstock, and edged it with a sponge, and the texture picks up beautifully.
Pages 11 & 12:

Pages 13 & 14:

If you haven't noticed, I used the pattern from Boston's baby scrapbook, and adjusted them into 12 X 12 pages. This layout has to be one of my favorites! I loved the ducks going across in Boston's book, and I love love love these butterflies embossed across the top of this layout! It adds elegance -- gotta love Versmark & Clear embossing powder!!!
Pages 15 & 16:

Using the corner rounder punch on the two vanilla pieces here really add to the pages. It was fun to see how my ladies used their stickers to fill in the gaps on this layout -- they are so creative. I just love these kits!
Pages 17 & 18:

We wove ribbon through our cardstock using the double rectangle punch technique. I just saw that this punch is retiring from the current catalog at the end of the month, so get one now if you want to ever do this great technique. And I love danglies on my cards or pages, so this is one of my favorite layouts.

Pages 19 & 20:

Love double-sided DSP! Makes turning down a corner beautiful.

Pages 21 & 22:

Another of my favorite layouts!!! Simple, but elegant. Hope my hubby doesn't mind butterflies in our wedding album :) I'll use these pages for "pictures of the bride" -- should work!


Pages 23 & 24:

Stamp Sets: Priceless
Cardstock: Kraft, Chocolate Chip, Close to Cocoa, Very Vanilla, Certainly Celery, Pretty in Pink, DSP from the Tie the Knot Simply Scrappin' Kit, Vellum Paper
Ink: Versamark, Pretty in Pink Craft, Pretty in Pink, Certainly, Chocolate Chip, Close to Cocoa Classic Inks
Accessories: Silver and Crystal Brads, Sponges; Double Rectangle, Heart to Heart, Photo Corners, Scallop Border Trim, Scallop Circle and Corner Rounder Punches; Perfect Polka Dots embossing folder, Beautiful Wings Embosslit die, Go Go Boots Alphabet Sizzlet Dies, Big Shot, Certainly Celery 5/8" Grosgrain ribbon, Dimensionals.
Great project, and now I get to add pictures!!! I'm working on the Toy Box kit first, and will get some of those pictures soon. Plus will add pictures using the other kits as well when I get them.
 We were so blessed to have some family come join us for Cami's special day. Above is her Aunt Carol, who traveled a great distance to come -- thanks Carol!! Below is her Grandma & Grandpa Riggs, who made the 3rd trip to Las Vegas from Hatch in one week! They had a wedding in Ohio that they flew from Vegas to a weekend before, went back to Hatch to take care of the farm, drove back for their grandson's graduation in Boulder City on Wednesday, drove back for a couple of days, and they were back down on Saturday for Cami's baptism -- they are the most dedicated people that I know. We truly are lucky to have such great family members!
 Megan and her BYU-I roommate Larissa hug Cami after her baptism.
 Our family right after she was baptized.
 Cami's Primary Presidency from church were all there to cheer her on! They are the most loving ladies, and help our kids grow up in the Lord.
 Cami and Taylor her friend, and Taylor her cousin!
 The Riggs extended family that attended, minus Mary, who had to go to work as soon as our first family picture was taken. It includes Aunt Carol, Aunt Bonnie & Uncle Karrl, Grandma & Grandpa, and Aunt Janice and Janika. We love you all for coming!
 All in all, it was such a special day. Our little Cami is an angel -- we are so blessed to have her in our lives. We love you Cami!


.JPG)
.JPG)


.JPG)
.JPG)
.JPG)